开发需要,发现这两个接口是一致的,做webview的就有口福了。
ios:https://github.com/marcuswestin/WebViewJavascriptBridge
android:https://github.com/lzyzsd/JsBridge
GO的GDB调试
GoLang语言,学了很久,一直觉得它单步调试有较多问题,最近才知道自已对它了解得太少了。
原来GO语言对GDB的版本是至少为gdb7以上,才能比较好的打印任意变量,如果低于这个版本,则才会出一些问题。
网上说GDB版本为7.1,本人使用GDB7.8版本测试,确实很不错。以下是记录单步调试使用的几个打印变量。
info frame,打印当前栈参数。
info locals打印局部变量
info args打印参数。
bt显示当前堆栈
x/3xw &r查看内存
删除调试符号:go build -ldflags “-s -w” filename.go
-s: 去掉符号信息。
-w: 去掉DWARF调试信息。
关闭内联优化:go build -gcflags “-N -l” filename.go
—————–
在centos6.6里利用原生的GDB调试时,发现如下特点。
1.直接使用list命令,会进入到一个如下状态。
(gdb) l

/usr/local/go/src/runtime/rt0_linux_amd64.s: No such file or directory.

in /usr/local/go/src/runtime/rt0_linux_amd64.s
2.可以使用l main.main命令定位到主函数。
(gdb) l main.main

warning: Source file is more recent than executable.

4

5	type point struct {

6	    x, y int

7	}

8

9	func main() {

10	i:=32

11	p := point{1, 2}

12	f := 3.3434

13	txt := "sdfsdfdsfsfds"
搜索引擎
Solr:http://lucene.apache.org/solr/,基于lucene的企业级搜索引擎
coreseek:http://www.coreseek.cn/基于sphinx的搜索引擎,适合论坛中小站类的搜索引擎
ibus输入法故障
sudo yum remove ibus --会将所有的输入法删除
安装ibus,ibus-table
sudo yum install ibus ibus-table –这样只会安装ibus的输入框架
sudo yum install ibus-table-wubi
yum install “@Chinese Support”
———————–
解决 CentOS 6.x 升级 Python2.7 后 Ibus 输入法无法使用问题
/usr/libexec/ibus-ui-gtk
/usr/ bin/ibus-setup
/usr/libexec/ibus-engine-table
将以上三个文件中的 “exec python” 修改为 “exec python26”
Dandelion的wordpress超赞主题
超赞主题:
原因是:跨界主题,支持移动版和PC版,包括前后台,前台适合wordpress后台适合二次开发。
http://pan.baidu.com/s/1kTxXKNX
Qt与Object-C混合编程
1.添加proxy_ios.h文件,内容如下:
#ifndef PROXY_IOS_H

#define PROXY_IOS_H
QString systemProxy();
#endif // PROXY_IOS_H
2.添加proxy_ios.mm文件,内容如下:
#import

#import

#include
QString systemProxy(){
NSDictionary *proxySettings = NSMakeCollectable([(NSDictionary *)CFNetworkCopySystemProxySettings() autorelease]);
NSArray *proxies = NSMakeCollectable([(NSArray *)CFNetworkCopyProxiesForURL((CFURLRef)[NSURL URLWithString:@"http://www.baidu.com"], (CFDictionaryRef)proxySettings) autorelease]);
NSDictionary *settings = [proxies objectAtIndex:0];
QString host = QString::fromNSString([NSString stringWithFormat:@"%@", [settings objectForKey:(NSString *)kCFProxyHostNameKey]]);
QString port = QString::fromNSString([NSString stringWithFormat:@"%@", [settings objectForKey:(NSString *)kCFProxyPortNumberKey]]);
// QString type = QString::fromNSString([NSString stringWithFormat:@"%@", [settings objectForKey:(NSString *)kCFProxyTypeKey]]);
return host+":"+port;
}
3.在.pro工程文件中添加:
ios {
QMAKE_LFLAGS += -framework OpenGLES
QMAKE_LFLAGS += -framework GLKit
QMAKE_LFLAGS += -framework QuartzCore
QMAKE_LFLAGS += -framework CoreVideo
QMAKE_LFLAGS += -framework CoreAudio
QMAKE_LFLAGS += -framework CoreImage
QMAKE_LFLAGS += -framework CoreMedia
QMAKE_LFLAGS += -framework AVFoundation
QMAKE_LFLAGS += -framework AudioToolbox
QMAKE_LFLAGS += -framework CoreGraphics
QMAKE_LFLAGS += -framework UIKit
QMAKE_LFLAGS += -framework CFNetwork
}
4.使用Qt添加proxy_ios.h和proxy_ios.mm文件。
5.在main.cpp文件中调用如下:
#include "proxy_ios.h"

void setDefaultProxy(){

    QString hostport = systemProxy();

    qDebug() <<"had find proxy address:" << hostport;
    if(!hostport.isEmpty()){
        QStringList ip_port = hostport.split(':');
        if(ip_port.length() != 2){
            return;
        }
        QString host = ip_port.at(0);
        QString port = ip_port.at(1);
        if(host.contains("null") || port.contains("null")){
            return;
        }
        bool ok = false;
        int iport = port.toInt(&ok);
        if(!ok || iport <= 0){
            return;
        }
        QNetworkProxy proxy;
        proxy.setType(QNetworkProxy::HttpProxy);//设置类型
        proxy.setHostName(host);//设置代理服务器地址
        proxy.setPort(iport);//设置端口
        QNetworkProxy::setApplicationProxy(proxy);
        qDebug() <<"+++had set proxy address:" << hostport;
    }
}
6.编译即可。
yii的URL美化
ULR美化需要nginx的配合完成的。
本人是使用阿里云的lnmp构建。故以其为例,记录如下:
1.nginx的配置如下:
首先是rewrite规则,在/alidata/server/nginx/conf/rewrite目录下增加aixuefo.conf文件,其内容如下:
location / {

        if (-f $request_filename/index.html){

            rewrite (.*) $1/index.html break;

        }

        if (-f $request_filename/index.php){

            rewrite (.*) $1/index.php;

        }

        if (!-f $request_filename){

            rewrite (.*) /index.php;

        }

}
接着是主站的配置,在/alidata/server/nginx/conf/vhosts目录下新增aixuefo.conf文件,其内容如下:
server {

        listen       80;

        server_name  www.aixuefo.com aixuefo.com;

	index index.html index.htm index.php;

	root /alidata/www/aixuefo;

	location ~ .*\.(php|php5)?$

	{

		fastcgi_pass  unix:/alidata/server/php/var/run/php5-fpm.sock;

		#fastcgi_pass  127.0.0.1:9132;

		fastcgi_index index.php;

		include fastcgi.conf;

	}

	location ~ .*\.(gif|jpg|jpeg|png|bmp|swf)$

	{

		expires 30d;

	}

	location ~ .*\.(js|css)?$

	{

		expires 1h;

	}

	#伪静态规则

	include /alidata/server/nginx/conf/rewrite/aixuefo.conf;

	access_log  /alidata/log/nginx/access/aixuefo.log;

}
然后是yii的组件配置:如下
‘urlManager’=>[
‘enablePrettyUrl’=>true,
‘rules’=>[
// ‘dashboard’ => ‘site/index’,
//
// ‘POST
// ‘
//
// ‘PUT
// ‘DELETE
// ‘
// ‘
‘posts’ => ‘post/default/list’, 只测试这个小小例子
],
],
QML退出进程例子
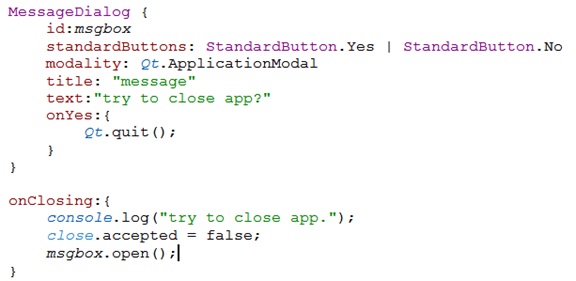
MessageDialog {

        id:msgbox

        standardButtons: StandardButton.Yes | StandardButton.No

        modality: Qt.ApplicationModal

        title: "message"

        text:"try to close app?"

        onYes:{

            Qt.quit();

        }

    }
onClosing:{
console.log("try to close app.");
close.accepted = false;
msgbox.open();
}
Qt的编译宏
打开pro项目文件,其宏格式如下:
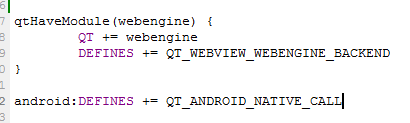
android标识代表,是应用android平台,因为qt是支持android和IOS的,android和IOS的配置差异就可以通过这来标识。
贴一个Android和IOS的宏:

QtAndroid调用java的例子
1.QtCreator创建QtExtra工程。
2.打开:项目->创建模板->确定。则可产生一个AndroidManifest.xml创建文件。
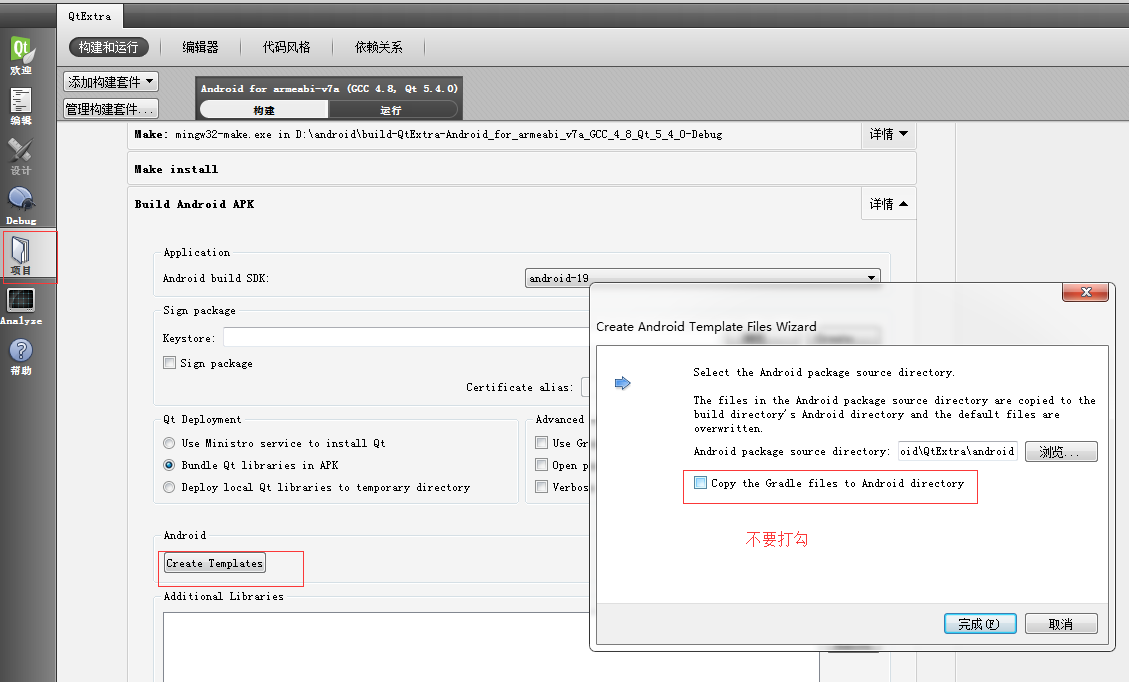
3.检查一下AndroidManifest.xml的所在目录。
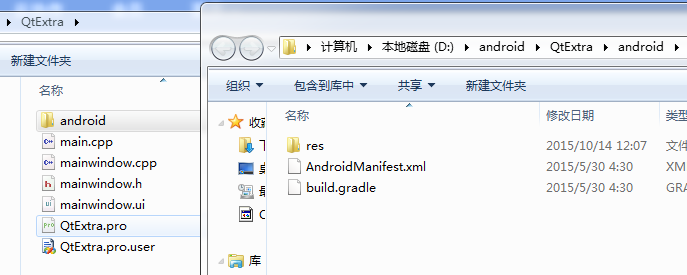
4.参考Qt5.4.2\Examples\Qt-5.4\androidextras\notification的例子,将其子目录android-sources\src目录拷贝到你的工程里,如下:
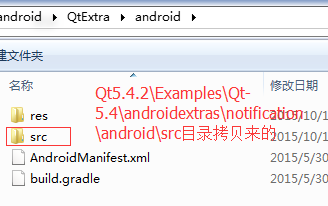
5.修改src目录下NotificationClient.java文件,如下:
package
org.qtproject.example.notification;
import
android.content.Context;
public
class
NotificationClient
extends
org.qtproject.qt5.android.bindings.QtActivity
{
public
static
String
systemProxy()
{
String
hostdef=“”,
host=“”,
port=“”;
int
portdef=0;
try{
hostdef
=
android.net.Proxy.getDefaultHost();
portdef
=
android.net.Proxy.getDefaultPort();
host
=
System.getProperty(“http.proxyHost”);
port
=
System.getProperty(“http.proxyPort”);
}catch(Exception
e){
}
return
hostdef+“:”+portdef+“|”+host+“:”+port;
}
}
6.在pro文件中添加androidextras库:
QT
+=
androidextras
7.在main.cpp函数里,这样调用:
#include
<QtAndroidExtras/QAndroidJniObject>
#include
<QDebug>
QAndroidJniObject
stringArray
=
QAndroidJniObject::callStaticObjectMethod(“org/qtproject/example/notification/NotificationClient”,
“systemProxy”,“()Ljava/lang/String;”);
QString
my
=
stringArray.toString();
qDebug()
<<
“my:”
<<
my;
8编译测试: